⚡ Get INSTANT ACCESS To 59,000+ Celebrities, Influencers & Public Figures Worldwide:
➡ Contact 59,000+ Celebrities
What You Get...

Perfect For:
➡ Contact 59,000+ Celebrities
What People Are Saying…
➡ Contact 59,000+ Celebrities
Join Now For Instant Access!
Join 500,000+ Happy Authors, Businesses, Fans & Nonprofits Who Have Used Contact Any Celebrity Since 1997.
Unlock Unlimited Celebrity Contact Information In Our Private Celebrity Database…
- Unlimited Celebrity Searches – Contact 59,000+ celebrities, influencers & public figures; 14,000+ representatives (agents, managers, publicists & attorneys); plus 7,000+ entertainment companies using our Celebrity Contacts Database of verified celebrity contact information and celebrity addresses.
Have you ever wondered how to contact a celebrity? Now you can contact celebrities directly! - Up-to-Date Celebrity Contact Information – Every database entry includes each celebrity’s verified mailing address, agent, manager, publicist, attorney, production company & charitable cause in an easy-to-use cross-referenced listing.
You also get each agent, manager, & publicist’s best email, address & phone number. - Cross-Referenced Search Results – Each celebrity’s address and contact information is cross-referenced & cross-linked in an easy-to-use list.
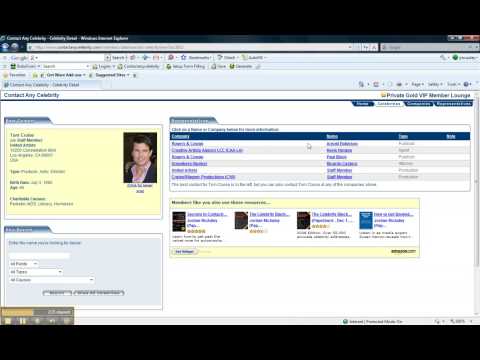
Click on a company to see its address, phone & email contacts, plus staff members.
For example, view a celebrity publicist contact list, a celebrity agent contact list, a celebrity manager contact list, etc., all with email, mailing addresses, and phone numbers.
Click on a staff member to see his or her email, address & phone number, plus a list of celebrities he or she represents.
Then click on a celebrity’s name to get his or her contact information delivered with our lightning-fast celebrity contact list & database directory.
Our Private Online Database is lightning-fast, saving you time, energy, & money! - Daily Database Updates – Our Celebrity Contact Information Database is updated daily, allowing you to see changes & new additions, and new celebrity addresses as soon as they’re published.
Other celebrity contact information sites offer outdated contact information and are often based outside the U.S. We’re based in the heart of Hollywood.
With our Dynamic Lookup Technology, you’ll always be up-to-date.
Now you can easily get in touch with celebrities! - Free Research Requests – Can’t find a celebrity you’re looking for? Just let us know.
We’ll research the celebrity’s new contact information, including email, address, agent, manager, and publicist, then update it in the Private Online Database ASAP.
Save time & money by letting us do your research! - Postage Refund Guarantee – If any letters are returned to you by the post office, send the return-to-sender envelopes back to us.
We’ll cut you a Postage Refund Check for 60 cents per return, plus the cost of returning them to us by U.S. Mail. We’ll also research and update the celebrity’s new address.
Our Postage Refund Guarantee is perfect for charities, fundraisers & nonprofits.
Never waste money on postage again – Membership pays for itself! - Celebrity Causes Database – Discover which celebrities contribute time and money to your nonprofit organization or charitable cause.
Choose the category of your cause from the All Causes tab in the Private Online Database, & you’ll get a list of celebrities known to donate.
The Celebrity Causes Database is a great resource for charities, fundraisers, & nonprofits! - 24/7 U.S. Based Customer Service – We specialize in customer service for our Members.
Contact Us anytime to ask questions about a celebrity’s contact information, make a research request, or update your account. - World-Class Membership – You don’t have to be famous to use Contact Any Celebrity, but that doesn’t stop some of our Members.
- Bonus E-Books, Insider Interviews & Special Reports – As a Special Bonus, you’ll get all our how to contact celebrities e-books: ‘Secrets to Contacting Celebrities: 101 Ways to Reach the Rich & Famous‘ ($20.00 Value!); ‘Celebrity Leverage: Insider Secrets to Getting Celebrity Endorsements, Instant Credibility & Star-Powered Publicity‘ ($30.00 Value!); ‘Help from Hollywood: How to Hold a Celebrity Autograph Auction & Raise Tons of Money for Your Cause‘ ($30.00 Value!) plus ‘The Lost Secrets of Fame & Fortune: How to Get (And Keep!) Everything You Desire‘ ($20.00 Value!).
Download them all inside the Private Member Lounge as soon as you Join Now. - 5-Star Satisfaction Guarantee – If you’re unhappy with your Contact Any Celebrity Membership, let us know.
We’ll either fix the problem to your satisfaction or issue a full refund, your choice.
There’s Zero Risk – we want you to be happy!
➡ Contact 59,000+ Celebrities
What Is Contact Any Celebrity?
As soon as you join Contact Any Celebrity, you’ll get instant, unlimited access to our Private Online Database and celebrity contact list of 59,000 celebrities, influencers, and public figures.
These celebrity contacts include the verified mailing address, agent, manager, publicist, production company (if applicable), and their professional representatives’ email addresses and phone numbers.
You also get monthly Insider Expert Calls, Free Research Requests, our famous Postage Refund Guarantee (see below) & more.
➡ Contact 59,000+ Celebrities
Do You Provide The Celebrity’s Personal Contact Information?
When you Join Contact Any Celebrity, you’ll get each celebrity’s agent, manager, publicist, production company, attorney, & charitable cause(s) in an easy-to-use celebrity contact list and online database.
We don’t provide personal celebrity phone numbers or celebrity email addresses. We provide celebrity home addresses unless the celebrity or a representative asks us to remove theirs.
How Accurate Is Your Celebrity Database?
Celebrities move & change representation daily. We can’t always be 100% accurate, but we try!
We research trade publications, make phone calls & getting client lists from top talent agencies, management companies, & PR firms.
➡ Contact 59,000+ Celebrities
What If I Can’t Find The Celebrity I’m Looking For?
Simply let us know!
We’ll research the new information, update the database & let you know what we find.
We rely on Members like you who let us know if they find outdated celebrity contact information.
It’s old-school crowd-sourcing – Members Helping Members!
➡ Contact 59,000+ Celebrities
Who Uses You?
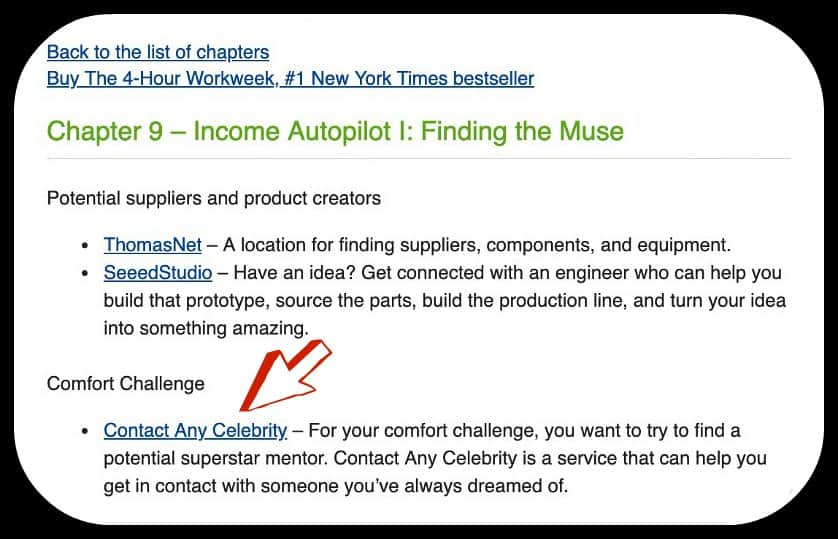
Everyone from bestselling authors (Tim Ferriss recommends us TWICE in his New York Times bestselling book, ‘The 4-Hour Workweek‘ plus in the Tools section of his ‘The 4-Hour Workweek’ official site) to 501(c) charities & nonprofits to ‘Shark-Tank‘-like businesses, entrepreneurs & marketers.
Contact Any Celebrity is also recommended by authors & writers, journalists & media, realtors & real estate agents, artists, designers, musicians, event planners, PR professionals, and more!
➡ Contact 59,000+ Celebrities
How Much Is Your Membership?
Contact Any Celebrity Membership is free for seven days, then $197/year or $39/month.
Membership gives you instant, unlimited access to our Private Celebrity Database. Get the best email, address, agent, manager, & publicist for 59,000+ celebrities, influencers, & public figures worldwide.
➡ Contact 59,000+ Celebrities
Why Do You Require A Credit Card?
We require a credit card because of the number of children, & teenagers we get who want to contact a celebrity.
A credit card verifies that you are at least 18 years old, & prevents unauthorized use of our site, like stalking or harassing celebrities.
We accept Visa, MasterCard, American Express, JCB, and Discover.
Can I Cancel Anytime?
Of course! Use your My Account link in the Private Member Lounge or email support@contactanycelebrity.com.
➡ Contact 59,000+ Celebrities
Do You Offer A Guarantee?

We sure do! If you’re not happy for any reason, just let us know.
We’ll fix the problem to your satisfaction or issue a full 100% refund.
We want you to be happy!
What If I Get Returned Mail?
Send any returned-to-sender envelopes back to us.
Per our famous Postage Refund Guarantee, we’ll cut you a check for fifty-five cents per return, plus the cost of sending them back to us by U.S. Mail.
We’ll also research the celebrities’ new contact information, update it in the database, & let you know what we find!
➡ Contact 59,000+ Celebrities
How To Contact Celebrities
Contact your favorite celebrity on their Official Site, Cameo, Facebook page, Instagram profile, LinkedIn profile, Snapchat account, TikTok account, Twitter account, or YouTube channel.
1) Make your request simple (remember to KISS – Keep It Short & Sweet!) 2) It’s hard to know the celebrity’s personal email address, so email the celebrity’s agent, manager, or publicist instead. 3) Be patient. Allow time for the celebrity’s agent, manager, or publicist to contact the celebrity about your request.
1) Remember the KISS Method: Keep It Short & Sweet! Make your request simple & easy. 2) Type your letter or use easy-to-read handwriting. 3) Always include a SASE (self-addressed stamped envelope). 4) Send to the celebrity’s mailing address. 5) Be patient! Celebrities are often traveling or on location. Receiving a reply can take 6-8 weeks (or sometimes several months). Be patient!
➡ Contact 59,000+ Celebrities
About The Author
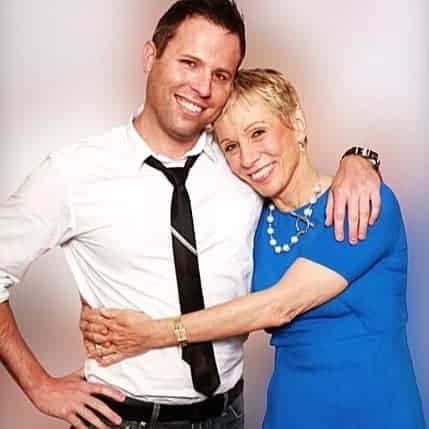
Jordan McAuley
Founder of Contact Any Celebrity with ‘Shark Tank‘ judge Barbara Corcoran
Jordan McAuley is the author of ‘Celebrity Leverage: Insider Secrets to Getting Celebrity Endorsements, Instant Credibility & Star-Powered Publicity,’ ‘Secrets to Contacting Celebrities: 101 Ways to Reach the Rich & Famous,’ & ‘The Celebrity Black Book: Over 56,000+ Verified Celebrity Addresses‘. He is featured by American Express OPEN Forum, CBS News, CNN, E! News, Entrepreneur Magazine, Fast Company, Forbes, FOX News, New York Post, USA Today, The Guardian, Tim Ferriss‘ The 4-Hour Workweek, The Mirror UK, The Wrap & more. He graduated from the University of Miami with Motion Picture Business and English Literature degrees from the School of Communication and College of Arts & Sciences. Jordan is a former 90s high school video store clerk who has lived and worked in Atlanta, Miami, Los Angeles, and New York City.